(In case you didn’t know… yes, we work on upholstery too!)
Another interesting project underway at Fine Arts Conservation this month–especially if you like chairs, as I do:
 Glass chair with zebra upholstery, 1947 (after a 1939 set of chairs made by the Pittsburgh Plate Glass Company for the Glass Center Pavilion at the 1939 New York World’s Fair) attributed to the designer Louis Dierra. Other examples of this chair can be found in the collections of the Brooklyn Museum and the Carnegie Museum of Art.
The chair looked like this when it first arrived at our studio:

Concealed beneath two layers of ugly modern upholstery and excess padding, we discovered the original upholstery, which is this wild zebra pattern fabric (so wild, you have to love it!)

Sadly, the first re-upholsterers slashed away the piping used to define the edges, disfiguring the original upholstery and making it unfit to be exhibited.

There was nothing to do but try to find an appropriate replacement fabric that matched the color and texture of the original, and (also very important) the size of the pattern’s repeat. After much searching and with the help of a curator in New York, we finally arrived at this excellent match made by Artek for Alvar Aalto designed chairs. The fabric is of very good quality and was quite expensive at $255/yard. It has exactly the same repeat size as our original zebra, though a slightly more irregular (and natural) stripe pattern.
This is what the chair looks like now, with the new upholstery.

We left the original fabric in place, isolated it with an undercover of washed, unbleached cotton muslin, and added a small amount of resin-free polyester batting to even out the shape. The new fabrics are attached to the plywood seat bottom over Nomex strips with a minimum number of stainless steel staples driven with a pneumatic staple gun at less than 40 psi. The latter is intended to minimize damage to the plywood from the metal fasteners.

The treatment of the crack in the glass was not as successful. The crack was so tight that we could barely get any HXTAL to flow into the crack, even after warming it. A little went into both ends, which suggests that at least the crack is stabilized and won’t continue to “grow”.

However, filling of the loss in the bottom edge of the glass worked out well. The fill was cast in place using HXTAL and a silicone rubber molded impression of the texture of the original glass.
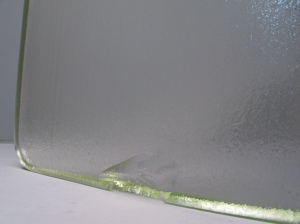
loss before filling

loss filled with HXTAL NYL-1 and textured to match
* * * * * * * * * * * * * * * * * * * * * * * * * *
See “Prophetic Panorama,” House and Garden, July 1939, p. 25 for a color rendering of the chairs at the 1939 New York World’s Fair.
* * * * * * * * * * * * * * * * * * * * * * * * * *
Here is a 1939 postcard from the fair, showing the Glass Center building
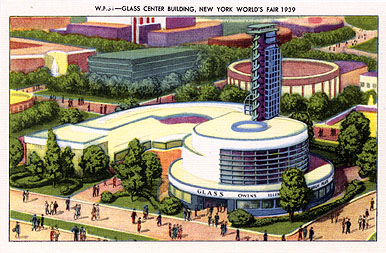
The Glass Center erected at the New York World's Fair 1939 has a floor area of 25,000 square feet and contains the exhibits of three leading glass companies. Corning Glass Works, Owens-Illinois Glass Company and Pittsburgh Plate Glass Company. The tower, 108 feet high is constructed of blue plate glass and glass block.


